Creating and Editing Invoices Directly in Stagepay
Stagepay makes it simple to create and modify invoices. Follow this guide to streamline your invoicing process and manage billing effectively.
Access the Invoice Page
Navigate to the dashboard and click the Add Invoice button. You will be redirected to the invoice creation page.

Set Invoice Details
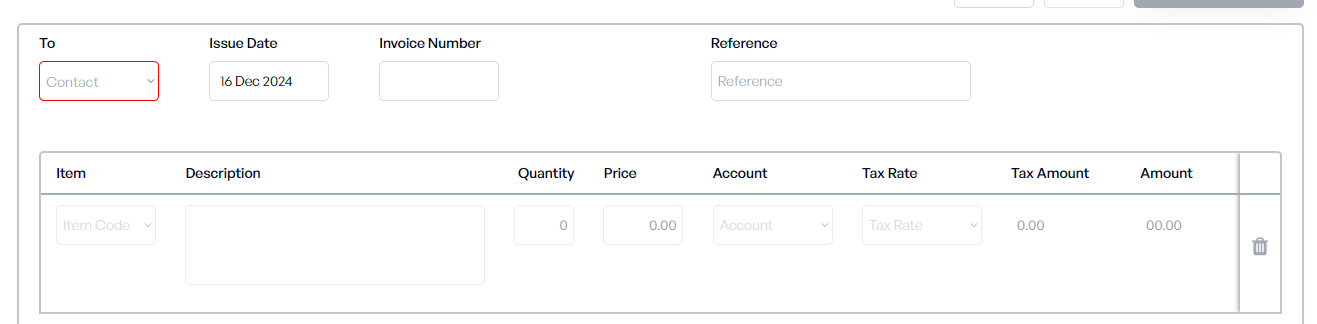
Contact: Select your contact from the dropdown menu. Once chosen, the invoice will be saved initially, and an invoice number will be generated.
Reference: Add a reference for easier tracking.
Line Items: Configure the invoice line items by specifying:
Item Code
Description
Quantity
Price
Account
Tax Rate
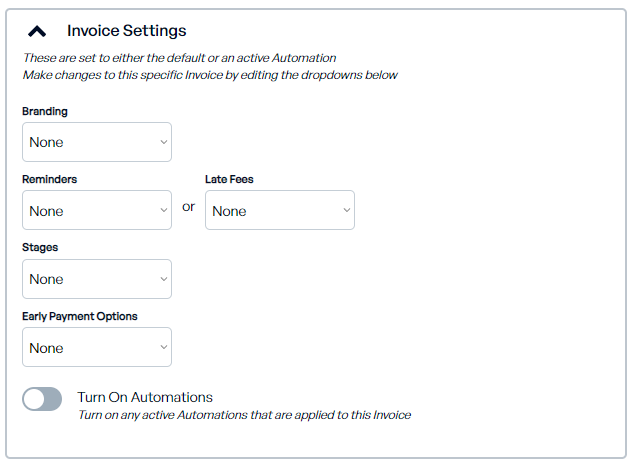
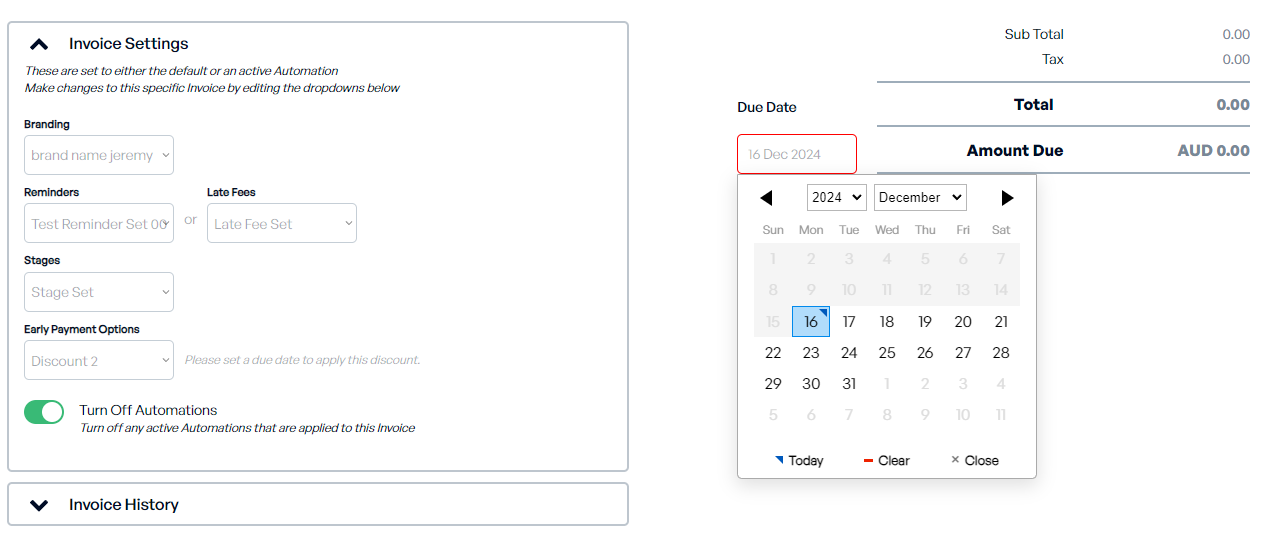
Invoice Settings
Automation: Choose whether to turn automations On or Off:
On: The automation set applied to the contact group will be automatically applied to the invoice.
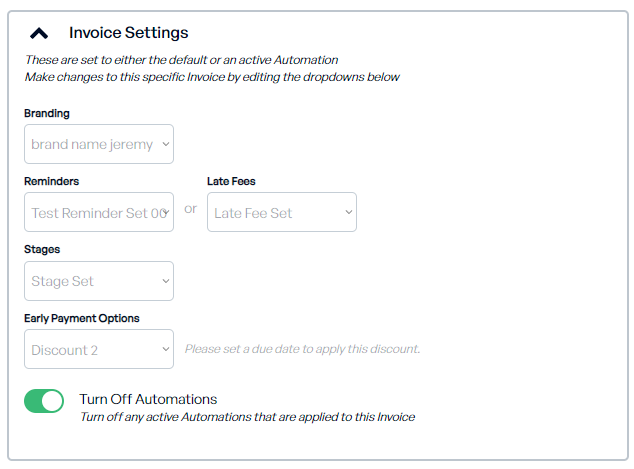
Off: You can manually select branding, reminders, late fees, stages, or discount sets to apply to the invoice.
Review Invoice Details
Invoice History: View the history of the invoice.
Total Amount and Amount Due: These values are automatically computed.
Set the Due Date
Choose the due date for the invoice.
Save and Approve the Invoice
Save: Save the invoice as a draft for further review. You can access it later from the draft page.
Approve and Send: Finalize and send the invoice:
An email invoice popup will appear. Enter the following:
Customer Email
Reply-To Email
Customer Name
Subject
Body
Click Send to send the invoice. The invoice status will update to Awaiting Payment.

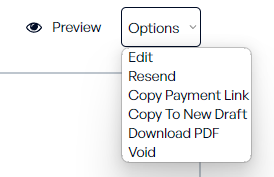
Manage the Invoice
In the Awaiting Payment stage, use the dropdown menu for options such as:
Edit
Resend
Copy Payment Link
Copy New Draft
Download PDF
Void the Invoice
Preview the Invoice
Click Preview to view the payment page, showing details like:
Amount Due
Due Date
Issue Date
Other Invoice Details
Options to contact the merchant or download the invoice.
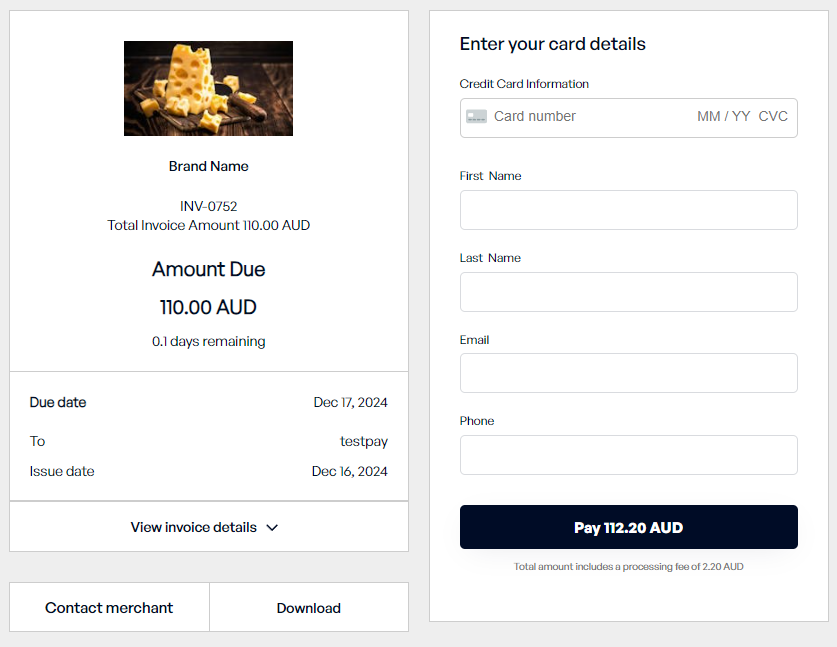
Process Payments
Customers can pay directly from the payment page by providing:
Card Number Details
First Name and Last Name
Email and Phone Number
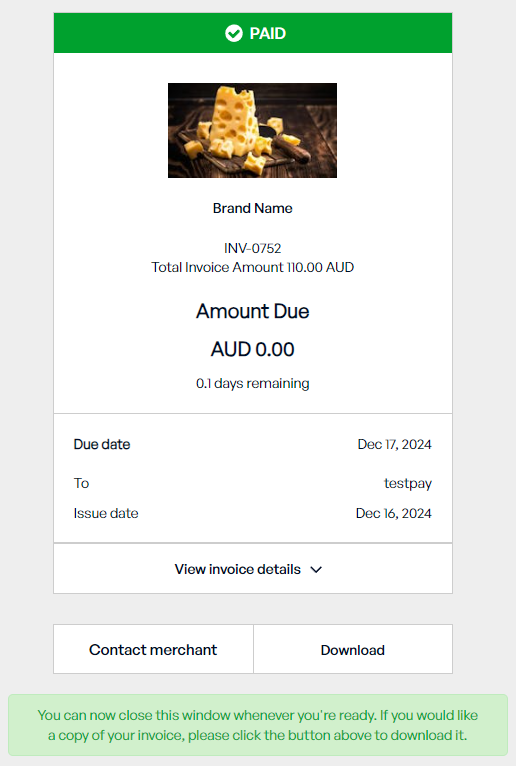
Once payment is completed, a confirmation page will appear with options to download the receipt.
You can edit an invoice using the same process as creating it. Simply navigate to the invoice, update the necessary details, and save the changes. Any modifications will reflect immediately in the invoice history.
Keep Information Accurate
Double-check customer details, line items, and amounts to avoid errors or confusion.
Use Templates
Apply default settings like branding, payment terms, and automations for consistency and efficiency.
Review Before Sending
Ensure all invoice details are correct before finalizing and sending it to customers.
Track Payment Status
Monitor invoice statuses (e.g. Draft, Paid, Overdue) directly in Stagepay to stay on top of your billing.
Automate Reminders
Utilize automation to send payment reminders for unpaid invoices, helping you maintain cash flow and timely payments.
By following this guide, you can effectively create, edit, and manage invoices in Stagepay, ensuring a smooth and professional billing experience for you and your customers.